Large-Format and Slab Tiles: Best Practices for Handling and Cutting Oversized Tiles
The large-format slab and tile are increasing in recognition among contractors due to their ability to provide an aesthetically pleasing appearance. But, these distinctive tiles have challenges of their own which must be dealt with during the installation process to ensure a satisfactory final product.
This will help you determine what pattern is best for gach terrazzo your project. This is particularly important when you are installing a long plank-shaped floor tile that are reminiscent of wood linen.
Installation
It is essential to spend the time to properly make a floor, wall or ceiling for the fitting of tiles. This will ensure you get a beautiful and even surface. It is particularly important to do this in the case of large-format tiles and slabs. These can be heavy. Every step, from mixing the mortar until that final scratch of the tile counts!
These large tile surfaces add the appearance of luxury and continuity to any space. They also require fewer pieces to be installed and a more streamlined and efficient procedure.
In order for large-format tiles to be properly mounted, you need to apply a thick layer of adhesive on the substrate. The most recommended adhesive is one that has high-performance properties and is not prone to sagging and helps limit lippage. You can purchase this type of mortar at the local store for supplies.
Once the floor is ready to be tiled, it’s time to design the layout. Here, a careful application will transform a huge tile stack into a seamless floor or wall. Start by creating the layout line. It’s possible to do this using a level laser to extend vertical and horizontal lines out from the center. Before putting the tiles in place it’s recommended to “back butter” the tiles.
Cutting
Slab tiles create a visually continuous surface and help to create a more sustainable living by reducing the need for frequent renovation. The less grout gives you a more elegant look and an accent piece that complements your home’s style.
Proper substrate preparation will help stop or limit cracks and lippage, so it’s recommended to grind high areas and patch lower ones prior to installing. It’s important to do a dry lay, too, to ensure the layout plan is accurate.
When your substrate is stable and flat, you are able to begin cutting. It’s crucial to follow the manufacturer’s directions with a careful eye when using a tile cutter. Make your cuts in advance and lay out the tiles prior to you start, especially when working with large tiles that are difficult to remove after they’ve been laid. Any small oversight could make a huge difference to the look of the final product. This will also reduce the amount of trash and you’ll be able to save money on materials and labor.
Layout Design
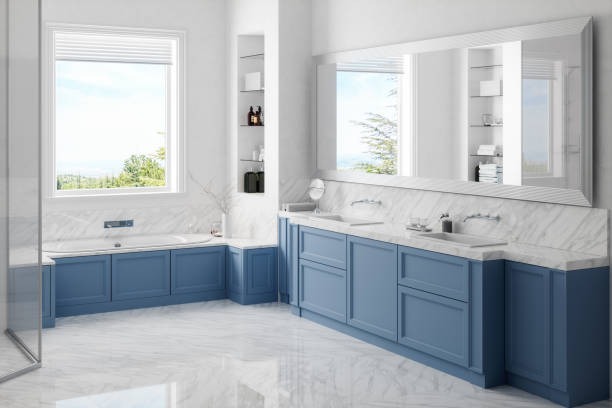
Porcelain slabs are a great option if you’re looking for a tile which is not just stylish, but also long-lasting. The large tiles come with a range of textures and patterns, from classic to contemporary, that can be used in all kinds of designs. Additionally, their larger dimensions result in fewer grout lines, which makes them much easier to keep tidy.
Layout planning is the method of organizing production equipment and materials according to the needs of the client and local regulations. It involves determining the amount of storage space is required and making sure that all centers have sufficient capacity.
A slab of one meter in size requires a team of three persons to handle it. Two workers need to handle the slab, while a third is a spotter, overseeing the path of the slab and helping to keep it from becoming a trip hazard. In this video MAPEI’s Chad Loveless acts as the spotter, while tile setters prepare the slab for cutting.
Control of Lippage
A stunning tile design is built upon two unassailable elements: a perfectly smooth surface and a design. If you do these two things correct, your installation will run smoothly. If you do them incorrectly, you will have to contend with smashed tiles, lippage and a generally ugly appearance.
To reduce the likelihood of a lippage issue, installers should follow the manufacturer’s recommendations and ANSI guidelines on flatness of the substrate. Installers should also make use of mortars specifically designed for heavy and large floor tiles to ensure adequate adhesion and support. The wrong kind of mortar could weaken the structural integrity the flooring and hinder its ability to properly cure and cause the shrinkage of lip and shrinkage.
Another critical step is to place joints between the slabs to ensure a 3 mm space. The installer can then easily detect and rectify any changes in the surface that could have occurred during the placement.
Handling
The secret to creating a stunning large-format tile job is long before you mix that first bag of thin-set. The process of preparing is crucial and includes a flat, perfectly positioned substrate, and a smart, strategic design. If you get these things right the floor will be the spacious and monolithic one that you’ve always wanted. If you don’t do them right, you may end up with cracked tiles, lippage, or a mess.
The proper preparation of the surface is the most vital aspect of any tile project It’s particularly important for large slabs. These rigid materials magnify any minor imperfections in the substrate, which can cause uneven surfaces (known as “lippage”) and stress cracks following the installation. To achieve an even, smooth surface, you’ll need to wash the substrate, fix it after which you can level it.
Making precise and clean cuts is the toughest element of working on huge slabs. You’ll need to use a wet saw that is of top quality to be able to work with large slabs without damaging them. By ensuring that the cuts you make are accurate, you can save time, money, and frustration.